
MARCH PUMP – CONVERSION – THE ISSUES AFTER EVERYDAY USE FOR A DECADE
Most folks will recall us modifying our generator raw water pump some 11 years ago so we wouldn’t need to replace an impeller ever again. Indeed we never have had to replace an impeller in all this time and it’s saved us a fortune and many head aches.
For reference see that video here:
https://www.youtube.com/watch?v=BibAbvMeGU8
We removed the raw water pump entirely and wired in a MARCH PUMP – directly wired to the output of the generator so it would only run when the generator operates.
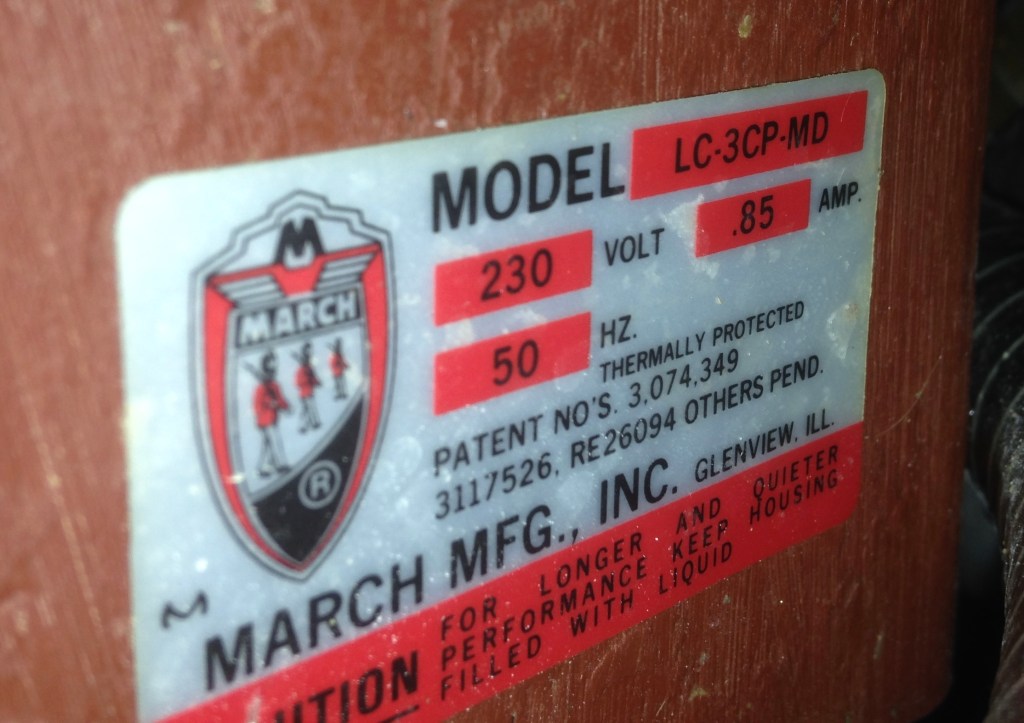
Here is the tag for the specific pump we used.
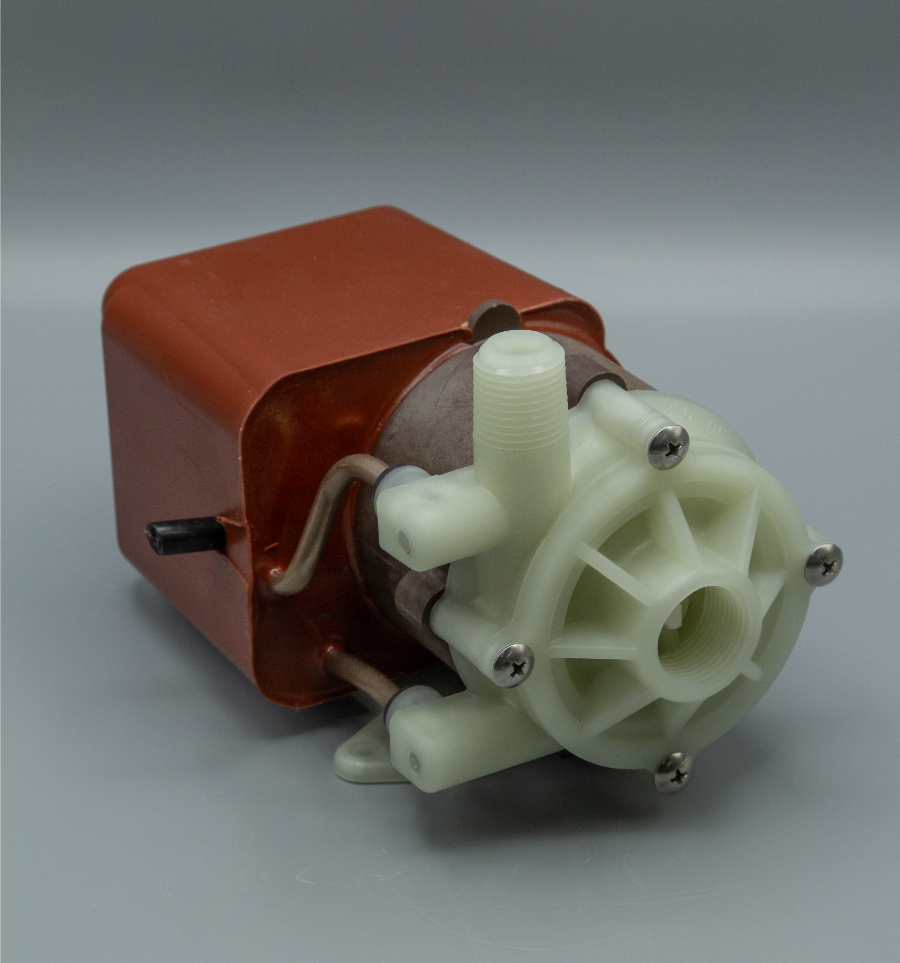
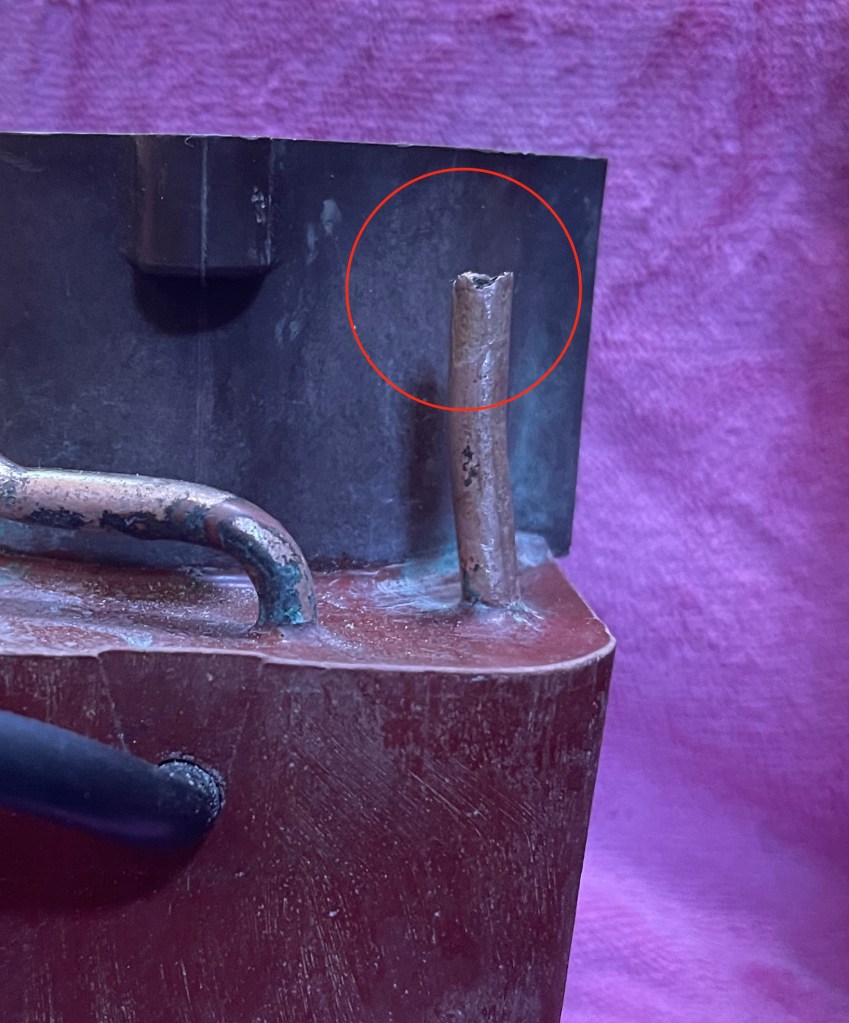
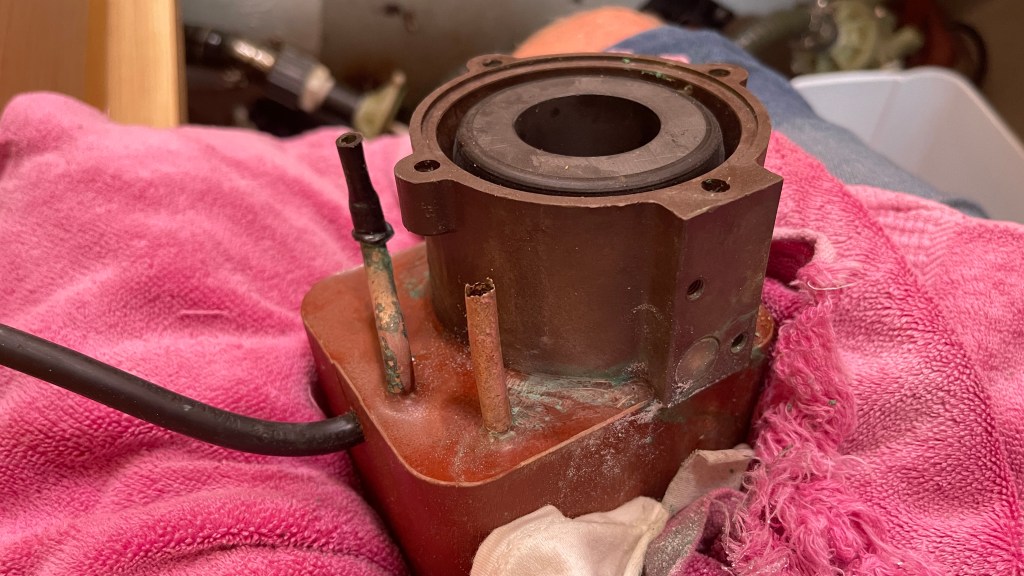
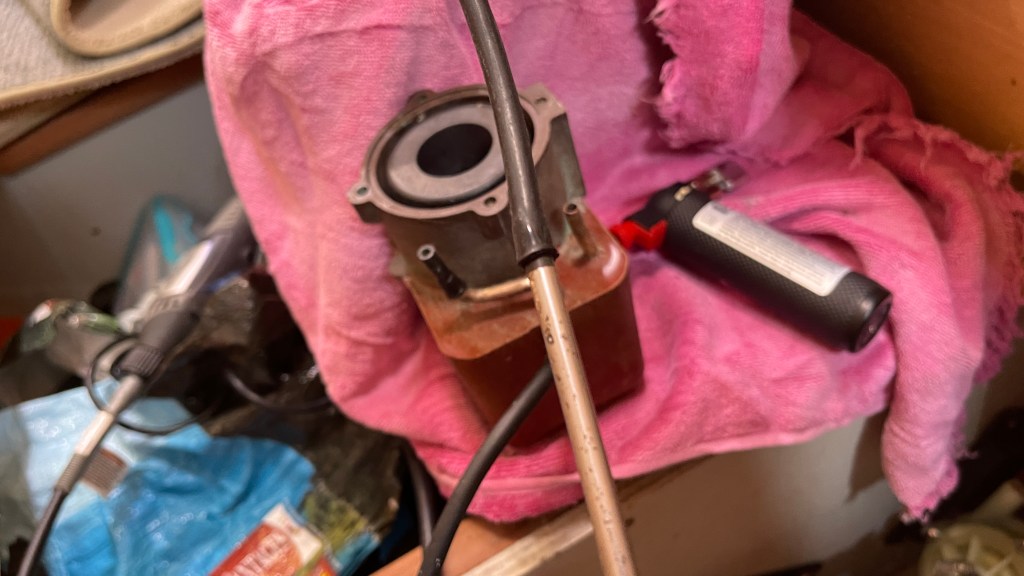
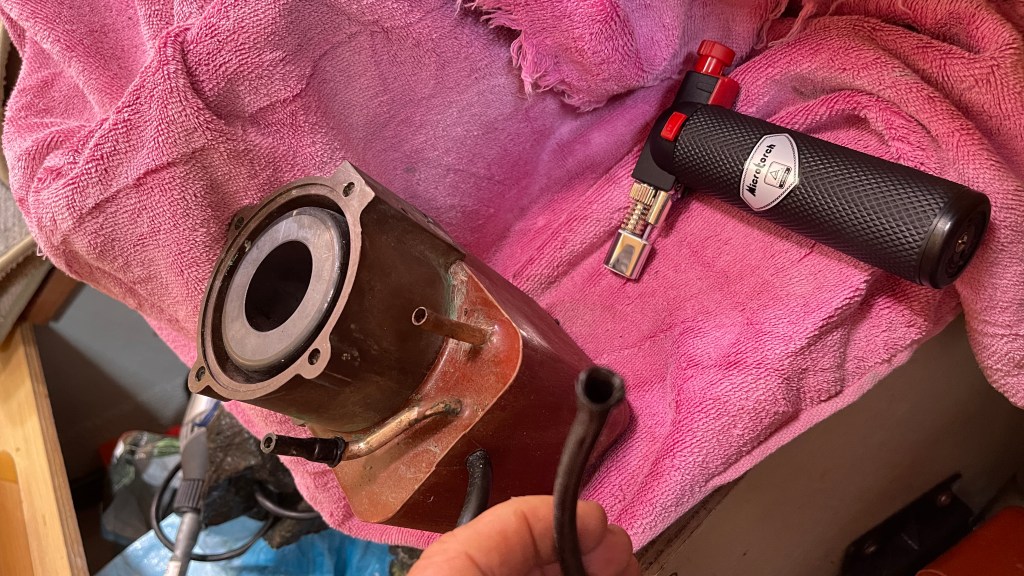
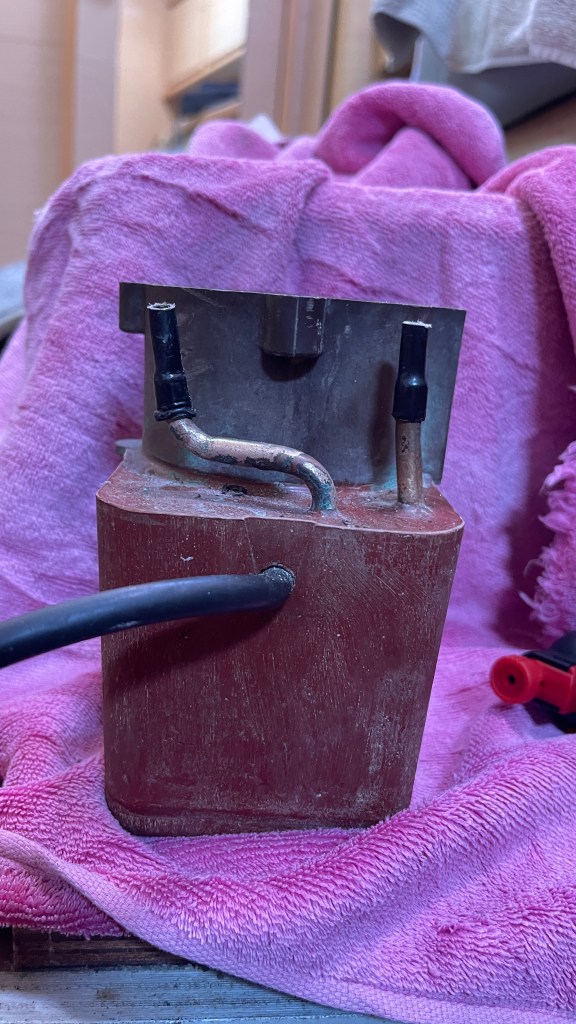
Recently I noticed the bilge pump coming on and upon investigation found the March Pump cooling tubes corroding at the point where they enter the rubber grommet – Item 10 below is the rubber grommet slides over the tube seen to its right.

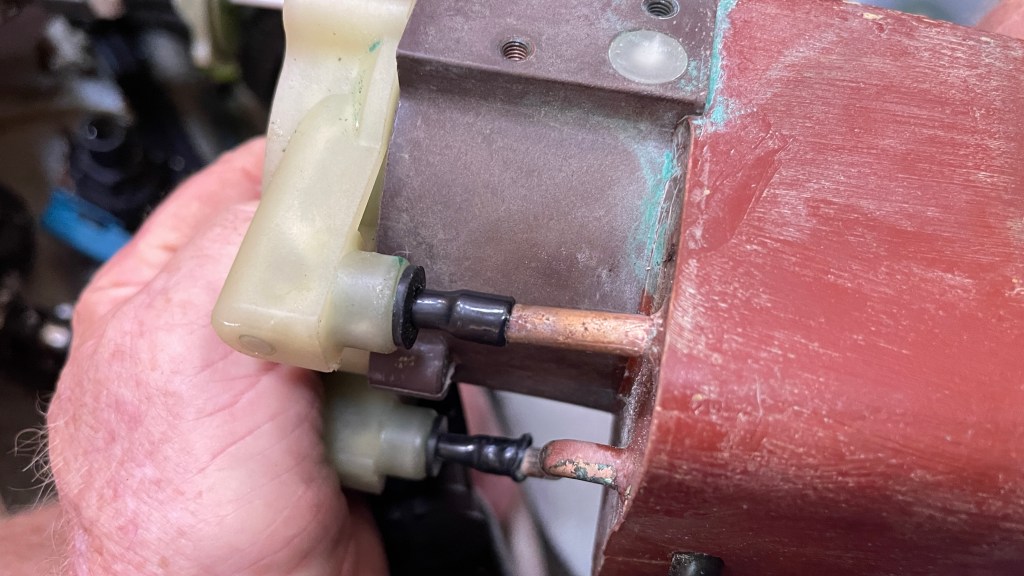
As can be seen below here is one of end of the cooling tube corroded – in fact both ends are corroded – so how are we going to fix this at sea with limited resources 🤔 .
Here is a step by step process of how we kept the unit operational and perhaps it will prove to be a long term solution ….
The pic below gives a quick look showing the solution done to one side and now for the other side:
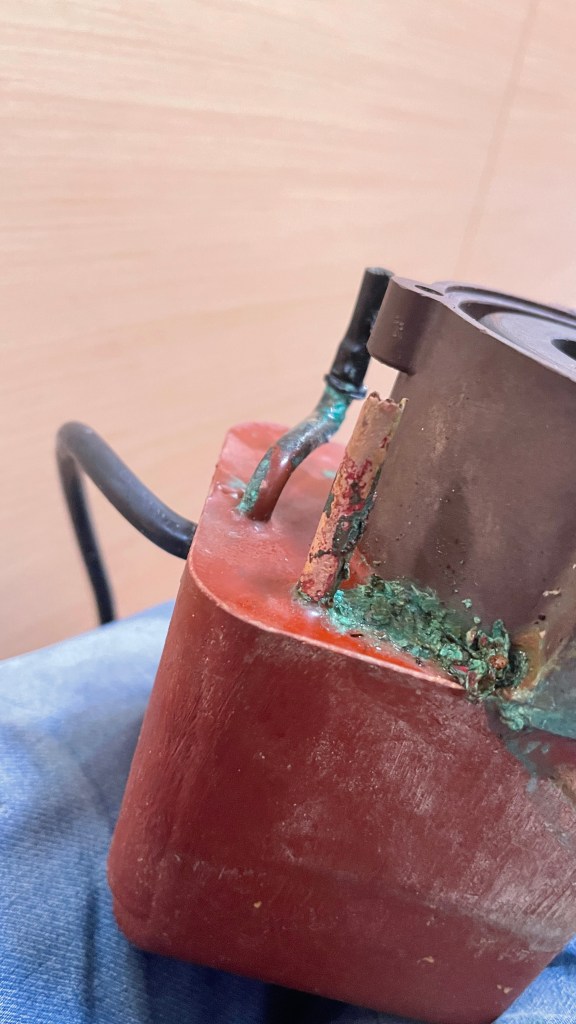
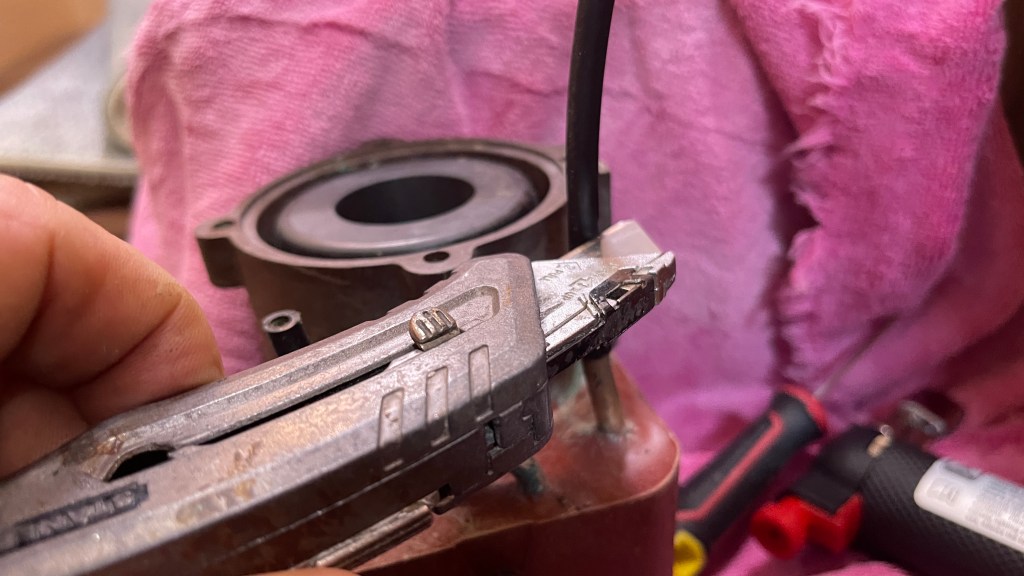
- Clean up the tube and pump body around the tubes:
2. Cut off the rotten section of the cooling tube and cut enough away to allow for the new tube to be inserted
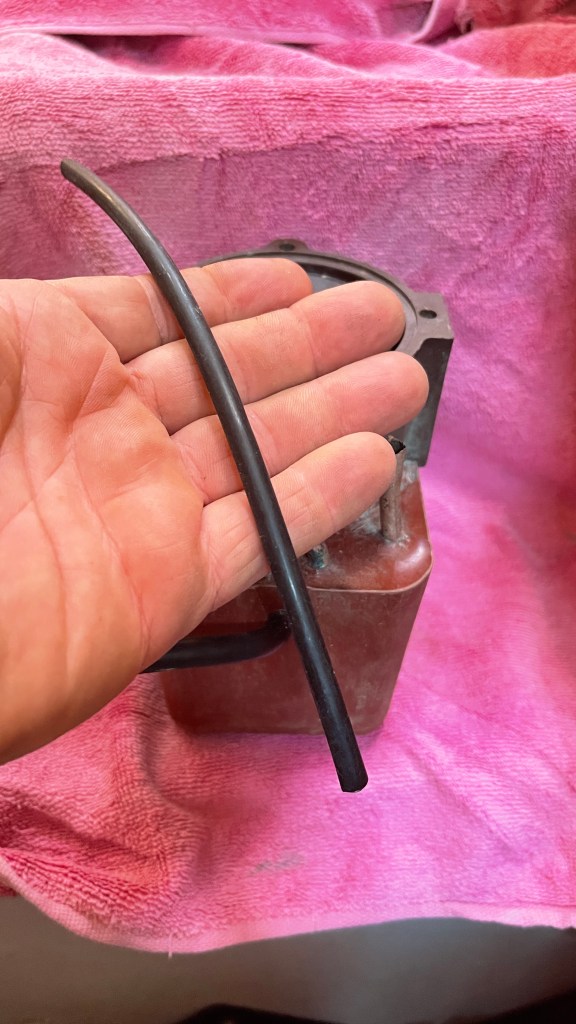
3. A stiff plastic style tube as ‘borrowed’ from our water maker will serve to seal and lengthen a new section to the copper cooling tube
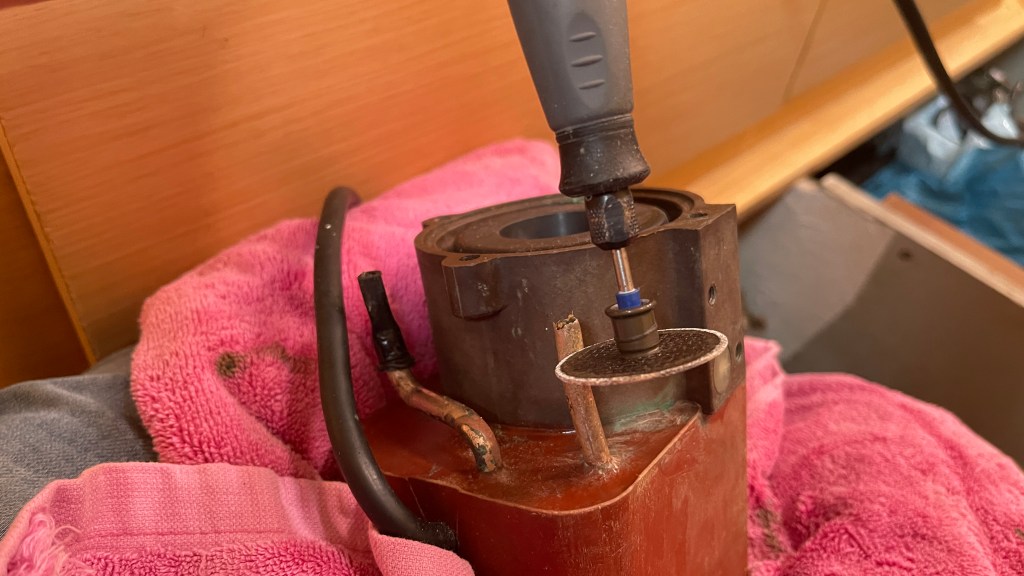
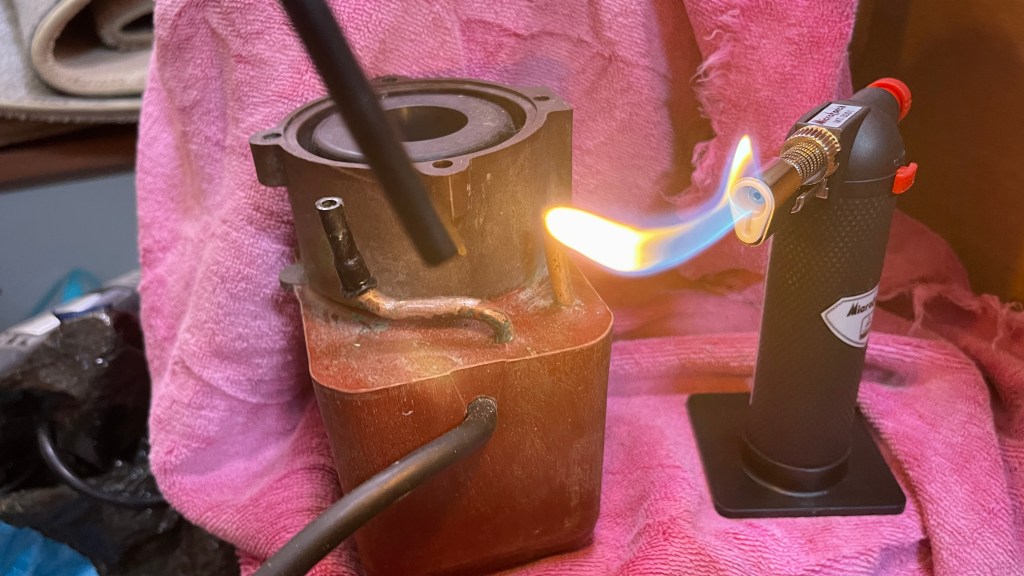
4. Warm up the end of the tube (Don’t melt it)
5. Use a Phillips screw driver or similar rod sized enough to slightly open the end of the pipe / tube to be inserted
6. Make sure the end is nicely flared after removing the screw driver. Note – it must just be opened enough to still have force applied when sliding over the copper tube
7. Warm the tube slightly – the idea is that it will take work / force to move the plastic tube over the copper tube . Once it is snugly fit, cut the tube to the exact height (just below the body flange where the top section will bolt to)
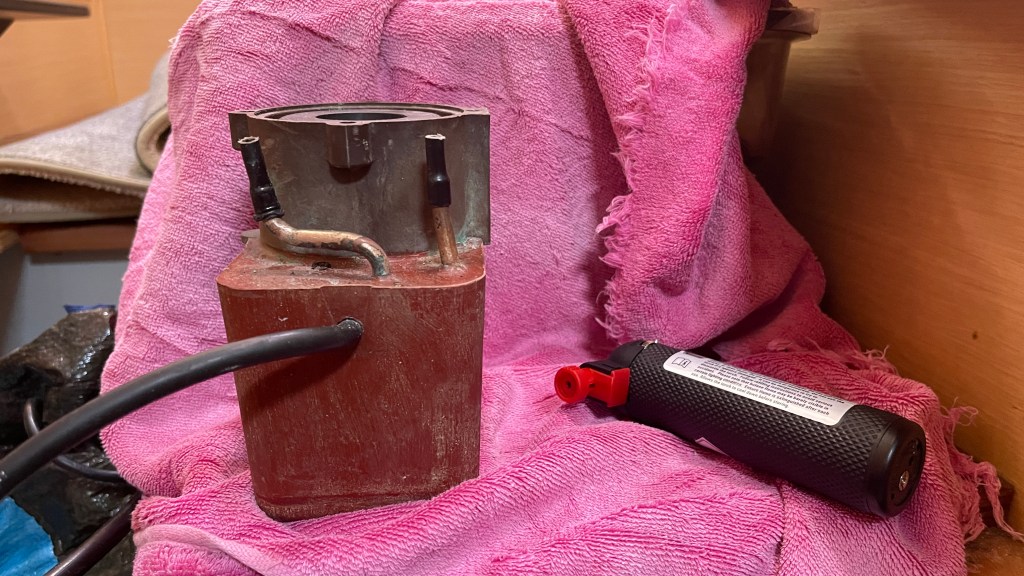
8. Here is a pic with both sections cut and ready for the magnetic impeller housing to be fitted
Here is the housing with rubber grommets cleaned nicely and ready for fitting over the new cooling tubes.
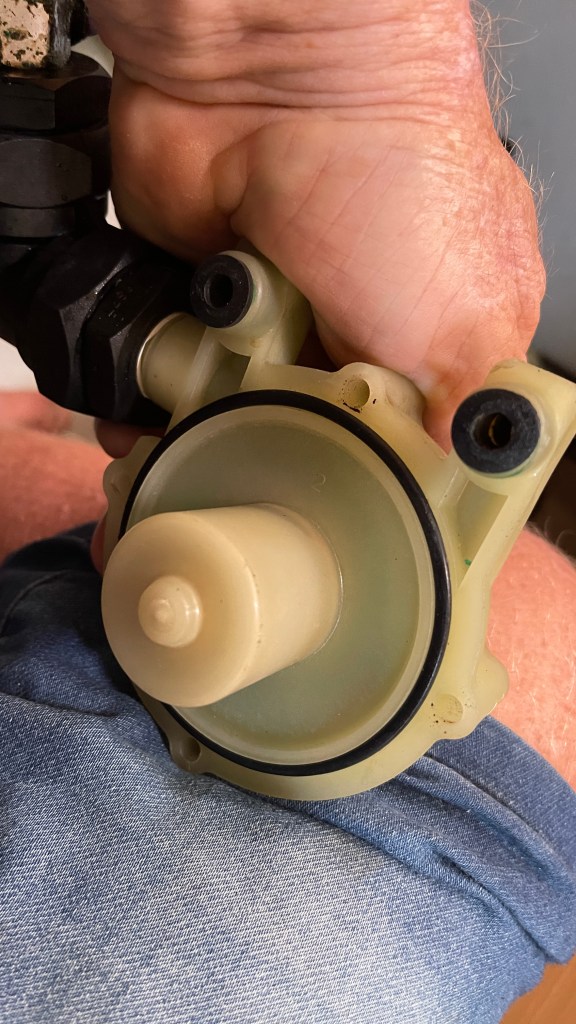
Install the magnetic housing assembly over the cooling tubes – you can flex the tubes for good entry
And there we are – it looks like this and it works a treat .

Cheers everyone – we’ve been running ours for a few weeks and it works very well. Let’s hope it buys us another decade on this pump which has otherwise been flawless in all this time.
Whilst I found the pump replacement is way over priced, I have to say that for the time and service it’s given us, it has been amazing.
There are a great variety of pumps out there but in my humble opinion (not an advert) the March Pump comes out on top !
We hope this saves many sailors money.
