

Rationale for extensions
On the Lagoon 440, the back / stern of the boat, also called the sugar scoop, has 3 steps of equal height. The bottom step, has a hatch cover which opens to access a swimming ladder beneath it. The hatch cover hinges and lock plate is secured into the fibre glass by screws or bolts and is a great concept to hide the ladder underneath. It is also a great way to access a ladder from the water. Sadly however, it has several negatives.
Firstly, when the boat is full with diesel or is heavily loaded for cruising, water sits underneath the bottom step and very quickly a reef grows underneath it in fertile waters. I wish I had a dollar for every time I cleaned this area out! Secondly, during our third Atlantic ocean crossing we lost the hatch cover all together and had to order another one from a lagoon dealer. At this point we secured the hatch by bolting the new one in.

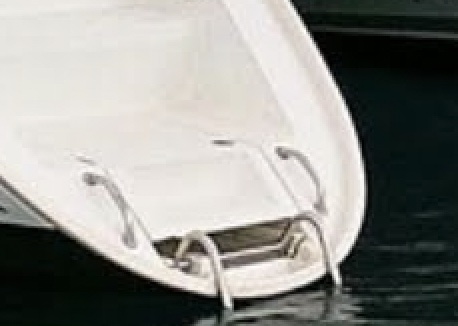
Last year on the way back from Sumatra to Australia, this happened again, but the hatch tore through the fibre glass where it had been previously bolted in. Water began to fill the engine room. Potentially this is very dangerous as the entire engine room can fill with water. In the original set up, the water can only be evacuated through the main bilge pump inside of the boat itself. A pipe runs through the stern bulkhead from the engine room to the main bilge in the boat allowing the centered bilge pumps situated midships in the keel well to do the work, but this pipe can easily get blocked from many bits and pieces including flaking of the sound proof materials etc.
As Brent had to get into crocodile infested waters to pull the pins out of the hinges we opted to transform the back of the boat, to make it safer and to avoid similar mishaps and considering all to allow us to upgrade our troublesome small tender to a bigger and better one. Tenders can be another topic for discussion however, for us, we’ve changed our mind about this and certainly want a bigger one for adventuring.
Process used to make Impi safer:
1. Design
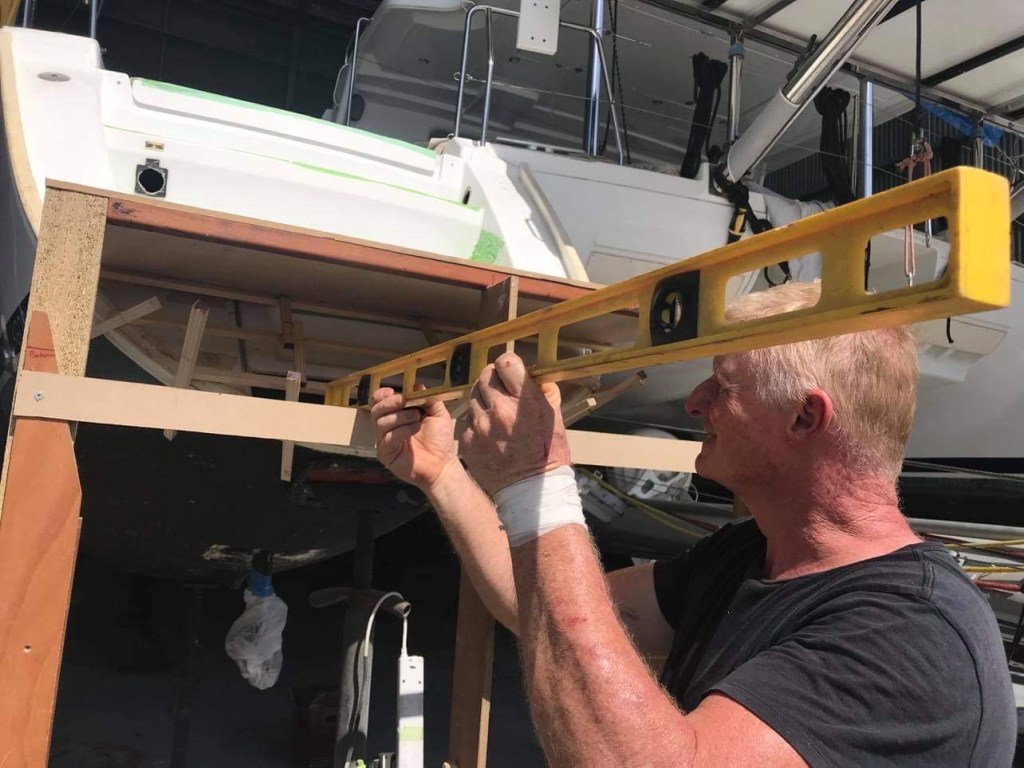
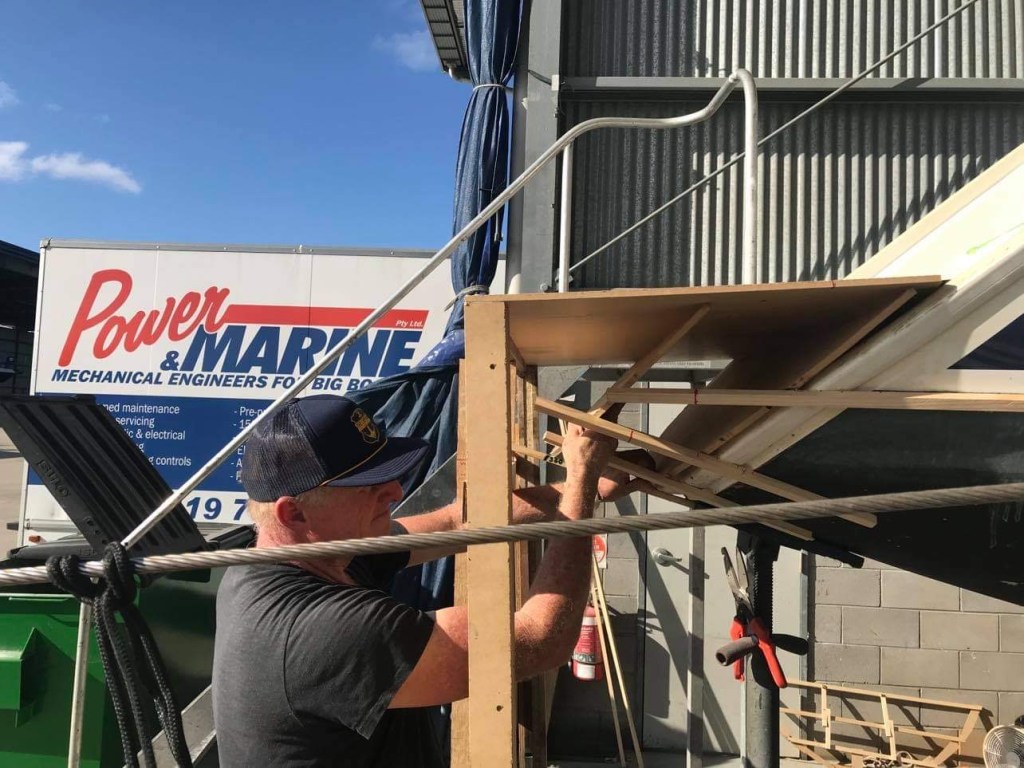
The trick is to establish an accurate fully loaded water line. Build a frame behind the boat and pull a string along the water line across the frame to see at what point the hull will leave the water. Brent wanted to maintain a Lagoon look and wanted to keep the transom looking ‘the part’ – sometimes extensions are overdone and can create a stern looking too thin when being pulled too far back – unless one compensates by raising the height of the back step or modifying the underside off the hulls which has its own design issues. We wanted to keep the step profile in perspective.
There are some disadvantages for extending the profile too far where the undersides are too high out of the water creating issues such as ‘water slap’. At anchor water slap can be irritating when trying to get in a good night’s sleep. For this reason we want to extend the stern such that it clears the water by roughly 100mm . If the objective is to extend even more to increase the water line further, then the process becomes more involved as one then needs to extend below the hull from the rudder or sail drive leg – this alters the shape (rocker) of the underside being a project requiring more engineering considerations. A great ‘father son’ team I had the pleasure of sailing with once, will do this for you at The Boat Works on GoldCoast Australia – Alex McMillan – they do a survey profile to the undersides of the hull and redesign for water flow and performance.
On the 440 very little extended scoop actually goes a long way, so depending on how much you intend to load the boat and slightly beyond where the water line strikes will determine the length added. Therefore the frame and water line is the crucial part of the whole project.
For clarity sake, we have removed the swim ladder hatch cover and cut out the ladder box itself leaving about 2″ from the top so it retains strength in the bend and can be an area to bond to. It’s important to keep as many ‘bends and shape changes’ in a boat as these all lend strengthening to the boat structure.

What we’ve done on Impi has worked really well and Brent took a lot of time in the set up. We had a company do the actual instal for insurance reasons although Brent was very much part of it, but the contractor wanted Brent to build the templates and take responsibility for the design. We felt that was a good thing as companies bill by the hour and may not spend as much time getting things just so!

2. Start of the build
At this stage Brent has already cut out the swim ladder box at the stern of Impi (engine and sail drive removed).
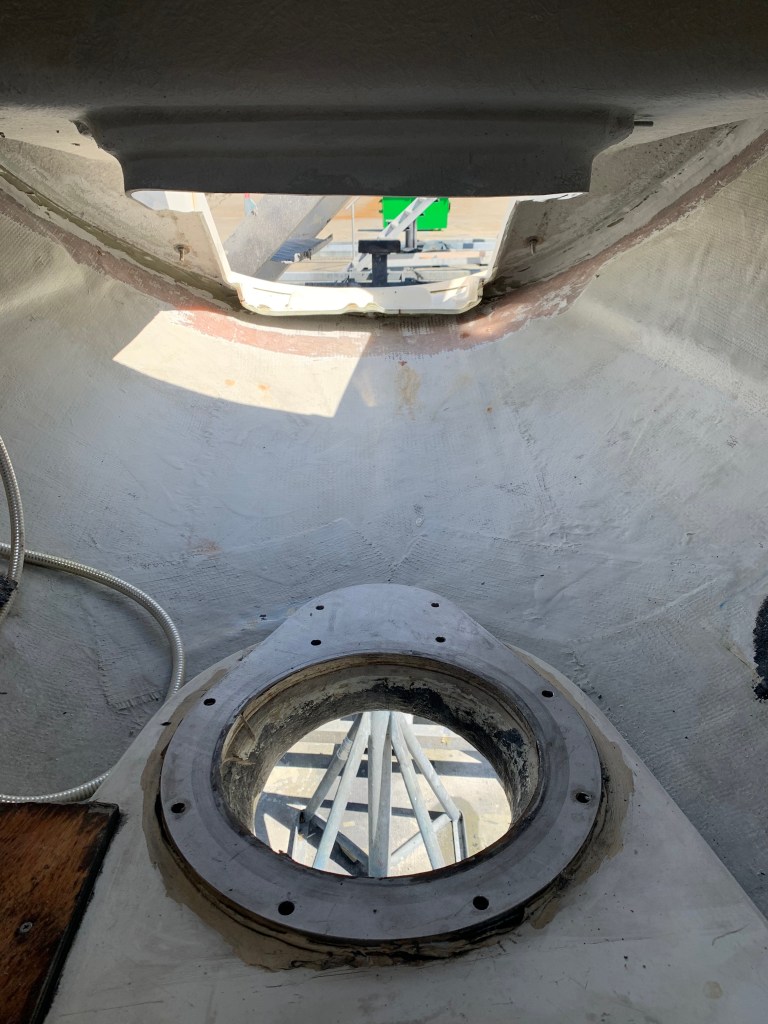
In this situation it is also a great opportunity to strengthen up the stern section of the boat which we did by prepping the area between the hull and sugar scoop mold, adding a decent cove here and layers of glass fiber.
In addition to this Brent has built in an additional bulkhead behind the engine as a safety feature.

Apart from additional structural support this also isolates the stern of the boat from the engine room and if there were to be any damage to the stern such as backing into a marina dock, the boat would not be in danger of filing with water.

He has also cleaned up the entire join between the step mold and hull and glassed this in for added strength. The power sandfile tool is one of the most important tools for this job.
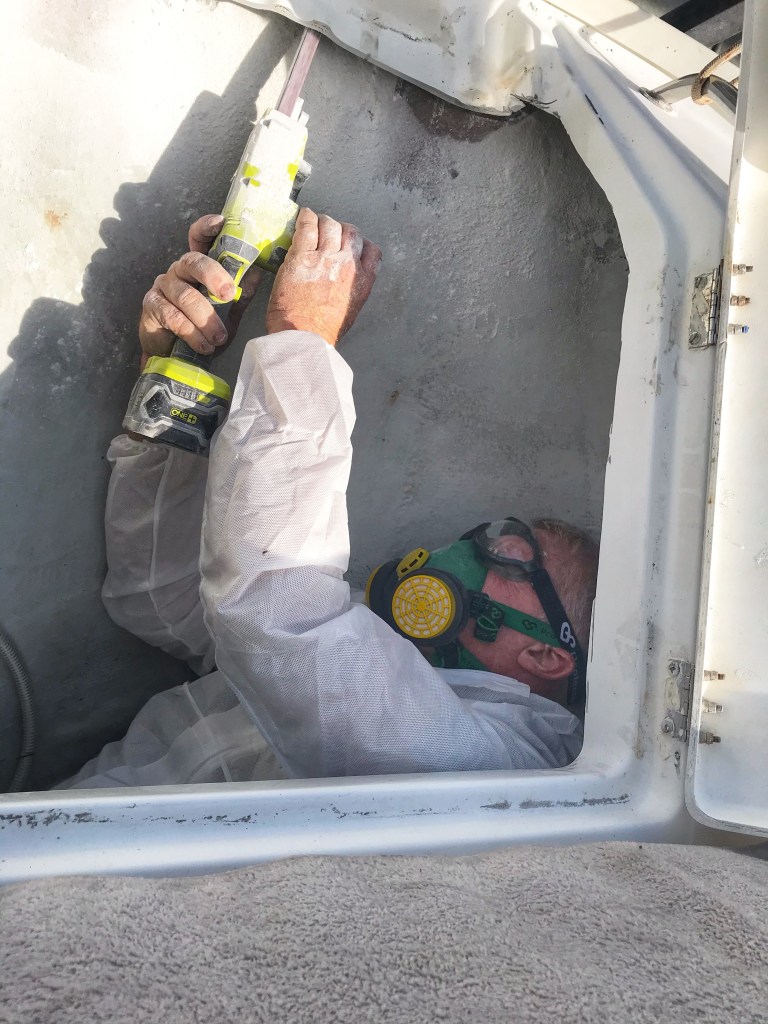
Sometimes, this requires a bit of yoga:

Without going into details about preparation, it is one of the most important parts to the project.
It involves the following:
- Removing any trim or other accessories
- Sanding/grinding all gel far enough back so that an efficient and effective bonding surface is created, which will link the extended part to the original hull. How well you do this is going to determine the strength of this bond.
- With the sanding completed you will need to blow away all loose material using an air compressor and or vacuum all particles leaving a clean surface.
- Wipe clean the area to be bonded with acetone.

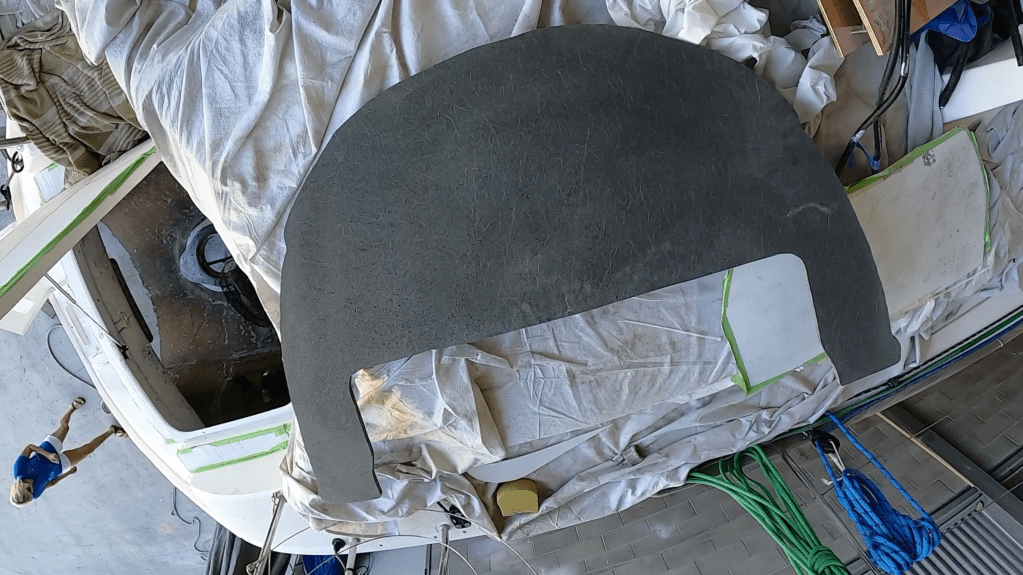
Here we see Dean from AME located at Gold Coast City Marina building the port side new extension. The material we’ve chosen for this is H80 CoreCell.
Once the templates are made, the Corecell was cut to profile and Dean used a circular saw tool to make grooves such that they did not penetrate all the way through the material but would allow the material to bend as it took shape with the hull.

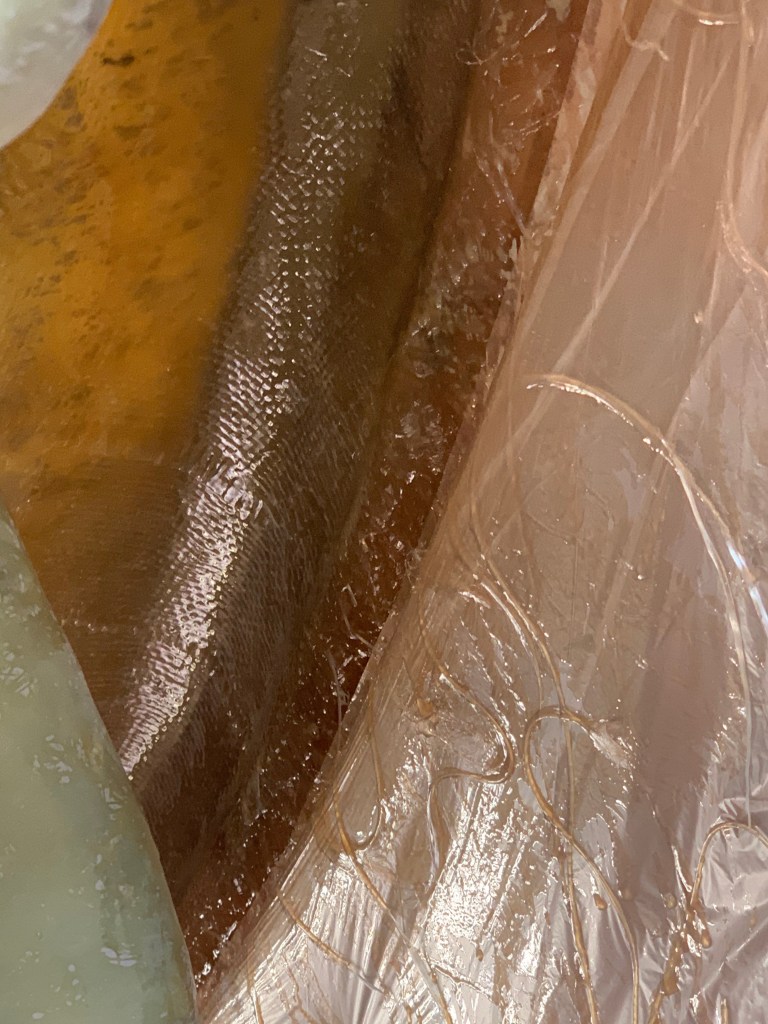
Bonded in place to the hull, the grooves are then filled with a Cabocil resin mix. (one can also use Aerosil – however and for whatever reason, we found Aerosil curing at the same rate (time) as Cabosil resulted in hairline cracks – a sign that is usually indicative of a mix that is too ‘hot’. We therefore opted to continue with Cabosil.
Once properly set, the whole area is lightly sanded making sure a smooth and clean surface is left for following layers to bond
This process and shape is important to get right as it sets the project up for finish and finesse – what one does here will determine how much work is required to finish the project properly.
A very important consideration throughout the process is to make sure proper bond is created between layers at all times. For this reason and ‘within reason’ one should never try to make a surface neater using ‘fillers’ between glass layers but always place glass fiber onto well prepared glass fiber (not over filler)
The next step is to determine the shape of the ‘stern transom board’ – it needs to be cut and shaped for a perfect fit.


We want to make sure the lid (step on platform) will fit correctly onto of the lower section. This may require some marking and grinding and some cases building up sections the lid will rest upon.
Once we’ve made sure all fits and is ready for glass fiber layering we do a final clean up to the outside and preparation for a good bond of the glass layers.
Having shaped the underside we are ready to start applying the layers:
You will hear the term ‘PEEL PLY’
Peel Ply is a woven dacron (rayon) cloth. Peel Ply is generally used to allow the builder to have a “re-bondable” surface which requires no additional preparation once the peel ply is removed.
The use of Peel Ply also provides for an enhanced surface free energy when removed. When a peel ply is removed, it fractures the resin matrix layer, leaving a slightly energized surface.
After all is ‘layered up’ and cured, we put bolts through the layers and the original joint between the sugar scoop step mold and hull …
We also prep the lid with aluminum ‘pads” for the new swim ladder to be built
Once cured we are ready to install additional support from the inside – is important to support the extension also as an added structure against impact against a dock for example :


So far, we’ve made sure the extended section is well supported by many layers of glass to the underside as well as to the inside. We’ve added a support strut also well glassed in on the inside. Even though we’ve glassed the manufacturer sugar scoop step mold section to the hull from the inside, we’ve also added bolts through the joined sections for additional support of these sections and we’ve glassed the bolt heads in on the underside. Brent played with the idea of adding foam blocks to the inside before closing the lid however decided to remove this – mostly because the thought of foam blocks coming loose and possibly shifting against the hull, lid or against each other could result in a squeaking noise under way. Since we have inspection ports accessible from the engine room in the mid section and high section of the bulkhead we can insert foam balls or even plastic balls to reduce area occupied by water ingress should this ever happen and therefore maintaining more floatation (through the displacement of water)
Time to glass the lid – we all went on Christmas holidays and therefore left the lids in place to cure over a three week period. It’s important over this time period to place heavy weights such as lead ingots (bars) onto of the curing lid or in the absence of these other heavy weighted items such as batteries or similar.

At this stage we are happy we’ve added enough glass layers especially around all the edges, sanded it back to a neat finish being careful not to sand away through layers. It’s now time to add our ‘Fairing Paste’ and bring the extension to line and level
What is fairing ?
Fairing refers to the filling and shaping of low areas so they blend with the surrounding surfaces and appear “fair” to the eye and touch. The goal of fairing is to create a surface without bumps or hollows.
Time to work down the fairing paste to line and level. We start with an 80 grit paper and work our way up to a good finish by eye.
Time to apply our gel coat. We are working on the predominantly ‘above water line section here :
When spraying gel coat on the boat one finds it dries with a stipple effect as opposed to smooth. Since we can’t cover everything in this blog, do research on spray gel types or even ‘brush types’ and never use acetone to thin it down.
Once the gel coat has set, we use a charcoal sponge to rub in charcoal. The charcoal will settle in highs and lows and as we sand this down for a smooth finish we will pass through the charcoal layer being very careful not to go too far and thus keeping the gel layer at a maximum.
Once this part of the gel has been polished to completion we prepare to lift a non skid mold from there boat for the extension. Many folks choose to cover this with teak (wood or synthetic) as blending the non skid into the boat extension is a time consuming task. However Brent wants this to be authentic and decides we will lift a mold from the coach roof area and transplant this onto the lid – extended part
MAKING A MOLD:
Fiberglass molding is a process in which fiberglass is placed wet to take the shape and form of an object, allowed time to dry and lifted off creating it’s mirror form. The process usually involves first making a mold and then using the mold to make the fiberglass component.
The Non Skid taken from the mold : This is a very similar process to making the mold itself. One repeats the process and lifts the mirror image from the mold making it identical to the original part.
Now it’s time to take the finished non skid part manufactured, cut it to profile, prep the flat section lid it will be secured to, add bog and chopped strand, ‘glue’ it down and once cured in place, prep the surrounding area to apply bog to form a cove which hopefully will flare the raised non skid section into the extension surround.
At this time the coved section to the non skid is carefully sanded to shape, gel sprayed and sanded again before final polishing.
The undersides are being finished off with fairing compound too:
It’s time to work on the swim ladder mount flanges
Now it’s just a case of finishing off everything. The undersides are faired and the antifoul folks at CAS will spray a barrier coat before putting on final anti foul layers, Choice Stainless Steel owner Geoff will make final measurements to manufacture the swim ladder, Maan from CAS antifoul solutions will apply the carrier layers, Alexis and Chris from ‘Sea Spray’ will make sure all is cleaned as part of an ongoing process, Rod and Mark from ‘Stripe n FX’ will apply the stickers, John Lance owner of Marine Trade Supplies (Super Store at The Boat Works) supplies the Jotun products and gives advice all under the watchful eye of Scooter the owner of AME who carried out the works. It’s one amazing team!
Time to launch and see how she floats:
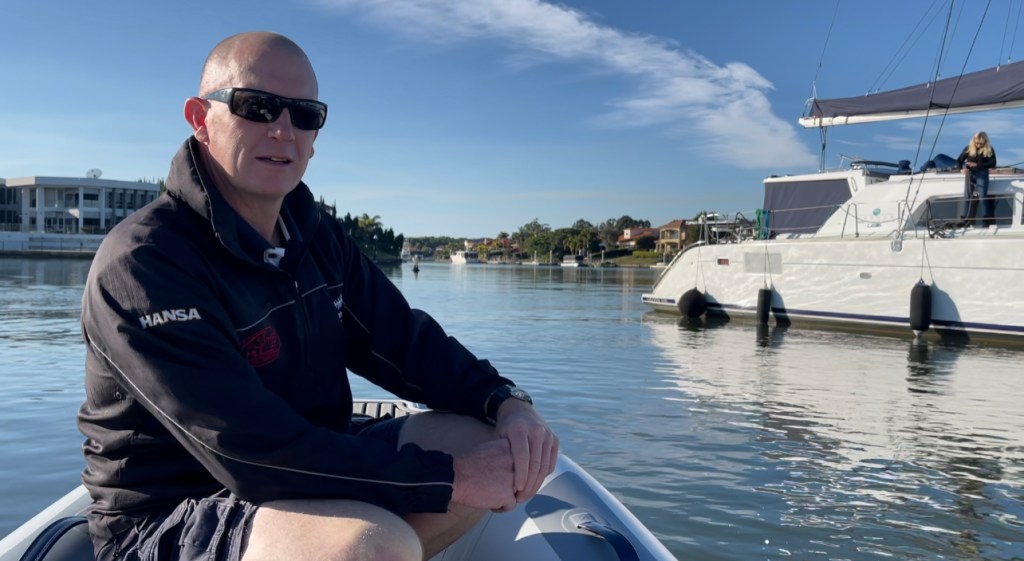
Sailing Again – out on Moreton Bay we have our first test sail with the extensions
Thanking so many who assisted us:
Euan McKinnon- our great mate who gave us a home and a car for 6 months (amazing generosity). Euan owns the boat called Kofi Kat (Lagoon 400) and coffee drives through outlets ‘Coffee Bug’. Kind people should be supported

Darrin and Elena Field – our mates who lent us a dock, cooked many meals, Christmas with their family and a lending hand whenever we needed it not to mention keeping the authorities in Australia updated with our progress as we returned from West Sumatra for Covid protection.

Peter and Karen Godward – helping us wherever they could

John Lance – MARINE TRADE SUPPLIES – the superstore of chandleries and huge thanks to John for many discounts and being an honorable ‘one stop supplier’ to Impi. (I wasn’t going to mention suppliers as there are many, however John really moved for Impi ‘Big Time’).

Jack Peters – Our old time friend and electrical expert – his parents having us over for pizzas and of course Jack always showing us his kind side with all things electrical. Very knowledgable and generous man he is.
Gianni and Jacqueline – for an awesome hot tub to soak our weary bones and some great meals – these are great friends we met years ago when sailing in New Caledonia and now Australian.

Ross O’Brien HIGHFIELD tenders -what started out as a straight purchase became a generous deal when they heard about the drama we had with our previous dinghy. We never asked for discounts and published much about the new Highfield tender which has made us extremely happy – and following this Highfield came to the party ‘big time’ – thank you Ross, Peter and Scott and the team and especially John Lance who introduced us. Highfield Tenders is definitely part of the Sailing Community Family looking out for their clients . Impi will continue to promote Highfield, not for income, but for being genuinely great people selling quality products and backing their warranty without question. We LOVE Highfield Tenders! (more about this to the future!)
Rory and Terry Crawford – our great mates from NSW who transported us from airports to consulates for visa purposes, stays in their beautiful home – amazing friends

Suzy Wilson – for sharing her home with us when we needed it – great friend

Darren and Kaitlyn Setch- who brought an air conditioner down to keep us cool in the shed
Richard Dackas – who brought us a fridge to keep cold drinks cold
Dan our refrigeration man – generously giving of his time to make sure Impi kept foods cold. Guys, if you are on the GoldCoast with need of refrigeration work, you won’t find better and nicer than Dan. Here’s his number +61 487046764

The team at THE BOAT WORKS who made this a pleasant experience in an otherwise difficult time for us to go through with all the modifications to the boat. Charmaine – Thank you for your kindness to Impi.

And to all the social media friends who popped in to offer their kind assistance – Australia is GREAT!
The main contractor involved is AME from the GoldCoast http://www.amemarine.com.au
AME – Scooter, Dean, Mitch – +61 7 5580 5905 (awesome, ethical team)
Main Supplier is Marine Trade Supplies https://marinetradesupplies.com.au
There are many other suppliers to thank and I will do this to the future when we share their work on the boat , people such as Choice Stainless Steel, Melfi Upholstery Designs, Southern Seas Marine and more …
Thank you!
